maharashtrianMediumvegetariannut freesoy free
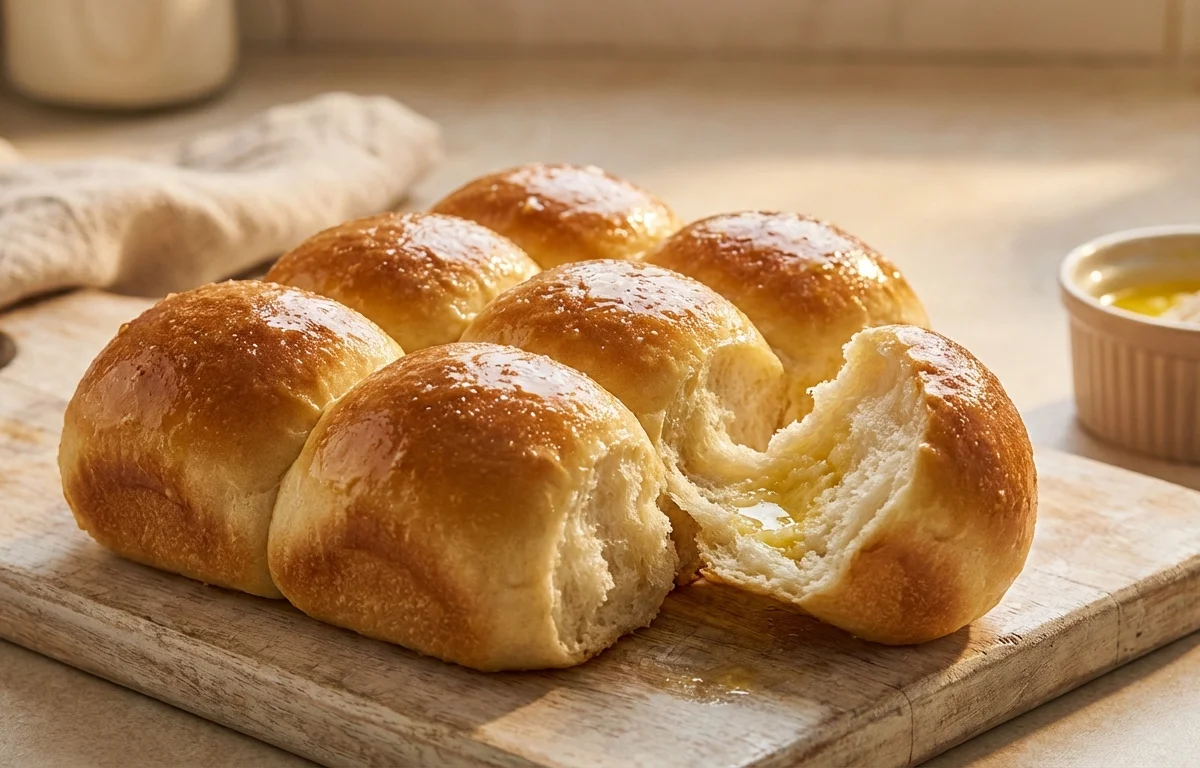
Ladi Pav
RATING
4.6/5(105)
TASTE SCORE
9/10
Pillowy soft, pull-apart dinner rolls straight from the streets of Mumbai. These fluffy, slightly sweet buns are the perfect vehicle for scooping up rich Pav Bhaji or holding a crispy Vada. A simple, satisfying bake for any occasion.
SERVINGS
6
INGREDIENTS
For 6 servings
NUTRITION · PER SERVING
297
297
CALORIES · 2 PIECES
Protein7g · 9%
Carbs54g · 73%
Fat5g · 15%
Fiber2g
Sodium429mg
Potassium114mg
Phosphorus91mg
INSTRUCTIONS
8 steps.
8 STEPS
- 1
Activate the yeast
- a.In a small bowl, combine the warm milk, warm water, sugar, and instant yeast. Stir gently and let it sit for 5-10 minutes until the mixture becomes frothy.
- 2
Make the dough
- a.In a large mixing bowl, whisk together the all-purpose flour and salt. Pour in the frothy yeast mixture and the 2 tbsp of melted butter. Mix with a spatula or your hands until a shaggy dough forms.
- 3
Knead the dough
- a.Transfer the dough to a lightly floured surface. Knead for 8-10 minutes until the dough is smooth, soft, and elastic. It should spring back when you press it lightly.
- 4
First proofing
- a.Place the dough in a lightly greased bowl and cover it with a damp cloth or plastic wrap. Let it rise in a warm place for 60-75 minutes, or until it has doubled in size.
- 5
Shape the pav
- a.Gently punch down the risen dough to release the air. Divide the dough into 12 equal portions. Roll each portion into a smooth ball, tucking the edges underneath. Grease a 9x9 inch baking pan. Arrange the dough balls in the pan, placing them close enough to touch each other as they rise.
- 6
Second proofing
- a.Cover the pan with a damp cloth and let the pav rise again for about 30 minutes, or until they are puffy and have almost doubled.
- 7
Bake the pav
- a.Preheat your oven to 375°F (190°C). Gently brush the tops of the risen pav with the 2 tbsp of milk. Bake for 15-20 minutes, or until they are golden brown on top. If they brown too quickly, you can cover them loosely with aluminum foil for the last 5 minutes.
- 8
Finish and serve
- a.As soon as the pav come out of the oven, brush them generously with the remaining 1 tbsp of melted butter. Let them cool in the pan for a few minutes before transferring to a wire rack. Serve warm.
PRO TIPS
What to keep in mind.
6 tips from the recipe — small details that make a real difference to the final dish.
- 1Ensure your milk and water are warm, not hot. Hot liquid can kill the yeast.
- 2Kneading is key! Proper kneading develops gluten, which gives the pav its soft, fluffy texture.
- 3Place the dough balls close together in the pan. This forces them to rise upwards and gives them their characteristic pull-apart shape.
- 4Don't skip the milk wash before baking; it gives the pav a beautiful golden color.
- 5Brushing with butter immediately after baking keeps the crust soft and adds flavor.
- 6Store leftover pav in an airtight container at room temperature for up to 2 days.
RECIPE VARIATIONS
Adapt it for your goals.
vegan
Vegan
Use plant-based milk like soy or almond milk, and replace the butter with a neutral vegetable oil or vegan butter.
healthyHealthy
Replace up to 1 cup of all-purpose flour with whole wheat flour (atta). You may need a little extra water as whole wheat flour absorbs more liquid.
kid friendlyKid friendly
Sprinkle some sesame seeds or grated cheese on top after the milk wash and before baking.
PAIRS WELL WITH