Sourdough Bread
A classic artisan loaf with a tangy flavor, chewy crumb, and a beautifully crisp, golden-brown crust. Perfect for sandwiches, toast, or enjoying with a simple pat of butter. This recipe uses a Dutch oven to achieve professional bakery results at home.
For 10 servings
8 steps. 45 minutes total.
- 1
Step 1
- a.Autolyse (1 hour)
- b.In a large mixing bowl, combine the 500g of bread flour and 375g of lukewarm water. Mix with your hands or a spatula until no dry flour remains. The dough will be shaggy.
- c.Cover the bowl and let it rest at room temperature for 60 minutes. This step, the autolyse, allows the flour to fully hydrate and gluten development to begin.
- 2
Step 2
- a.Incorporate Starter and Salt (30 minutes)
- b.Add the 100g of active sourdough starter to the top of the dough. Use wet hands to dimple the starter into the dough, then use a pinching and folding motion to fully incorporate it. This should take about 3-4 minutes.
- c.Cover the dough and let it rest for 20-30 minutes.
- d.Sprinkle the 10g of fine sea salt over the dough. Use the same wet-handed pinching and folding technique to mix the salt in thoroughly.
- 3
Step 3
- a.Bulk Fermentation (4-5 hours)
- b.Transfer the dough to a clean, lightly oiled container or keep it in the same bowl. Cover it.
- c.Let the dough ferment at a warm room temperature (around 75-78°F / 24-26°C).
- d.During the first 2 hours, perform 4 sets of 'stretch and folds' spaced 30 minutes apart. To do this, wet your hands, grab one side of the dough, stretch it upwards, and fold it over the center. Rotate the bowl and repeat on all four sides.
- e.After the final set of folds, cover the dough and let it rest undisturbed for the remaining 2-3 hours of bulk fermentation.
- f.The dough is ready when it has increased in volume by about 30-50%, feels airy, and has a few visible bubbles on the surface.
- 4
Step 4
- a.Shaping (30 minutes)
- b.Gently scrape the dough out onto a lightly floured work surface. Be careful not to deflate it too much.
- c.Pre-shape the dough into a loose round (boule) by gently tucking the edges underneath. Let it rest, uncovered, on the counter for 20-30 minutes.
- d.Flip the dough over and perform the final shaping. Gently stretch it into a rectangle, then fold it like a letter. Roll it up from the short end, creating a tight skin on the surface. Pinch the seams closed.
- e.Generously dust a banneton (proofing basket) with rice flour. Place the shaped dough seam-side up into the basket.
- 5
Step 5
- a.Cold Proof (12-18 hours)
- b.Place the banneton inside a plastic bag or cover with a reusable shower cap to prevent a skin from forming.
- c.Transfer the basket to the refrigerator and let it cold-proof for 12 to 18 hours. This slow fermentation develops the characteristic tangy flavor and improves the crumb structure.
- 6
Step 6
- a.Preheat Oven and Dutch Oven (1 hour)
- b.Place a large Dutch oven with its lid on inside your oven.
- c.Preheat the oven to 500°F (260°C) for at least 1 hour to ensure the Dutch oven is extremely hot.
- 7
Step 7
- a.Score and Bake (45 minutes)
- b.Carefully remove the hot Dutch oven from the oven. Take the dough from the refrigerator.
- c.Invert the dough from the banneton onto a piece of parchment paper. The seam-side is now on the bottom.
- d.Using a sharp blade or bread lame, make one confident slash across the top, about 1/2-inch deep, at a slight angle.
- e.Using the parchment paper as a sling, carefully lower the dough into the hot Dutch oven. Place the lid back on.
- f.Reduce the oven temperature to 475°F (245°C). Bake for 25 minutes with the lid on.
- g.Remove the lid. The bread should have 'sprung' up. Continue baking for another 15-20 minutes, or until the crust is a deep, dark golden brown.
- 8
Step 8
- a.Cool Completely (2-4 hours)
- b.Immediately remove the bread from the Dutch oven and place it on a wire rack to cool.
- c.It is crucial to let the bread cool completely, for at least 2 hours but preferably 4, before slicing. The internal structure is still setting, and cutting it warm will result in a gummy texture.
What to keep in mind.
6 tips from the recipe — small details that make a real difference to the final dish.
- 1For the best flavor and rise, ensure your sourdough starter is very active. It should have at least doubled in size and be full of bubbles 4-8 hours after feeding.
- 2Use a digital kitchen scale for all measurements. Sourdough baking is precise, and volume measurements can be inaccurate.
- 3The temperature of your dough and environment is critical. A warmer environment will speed up fermentation, while a cooler one will slow it down. Adjust times accordingly.
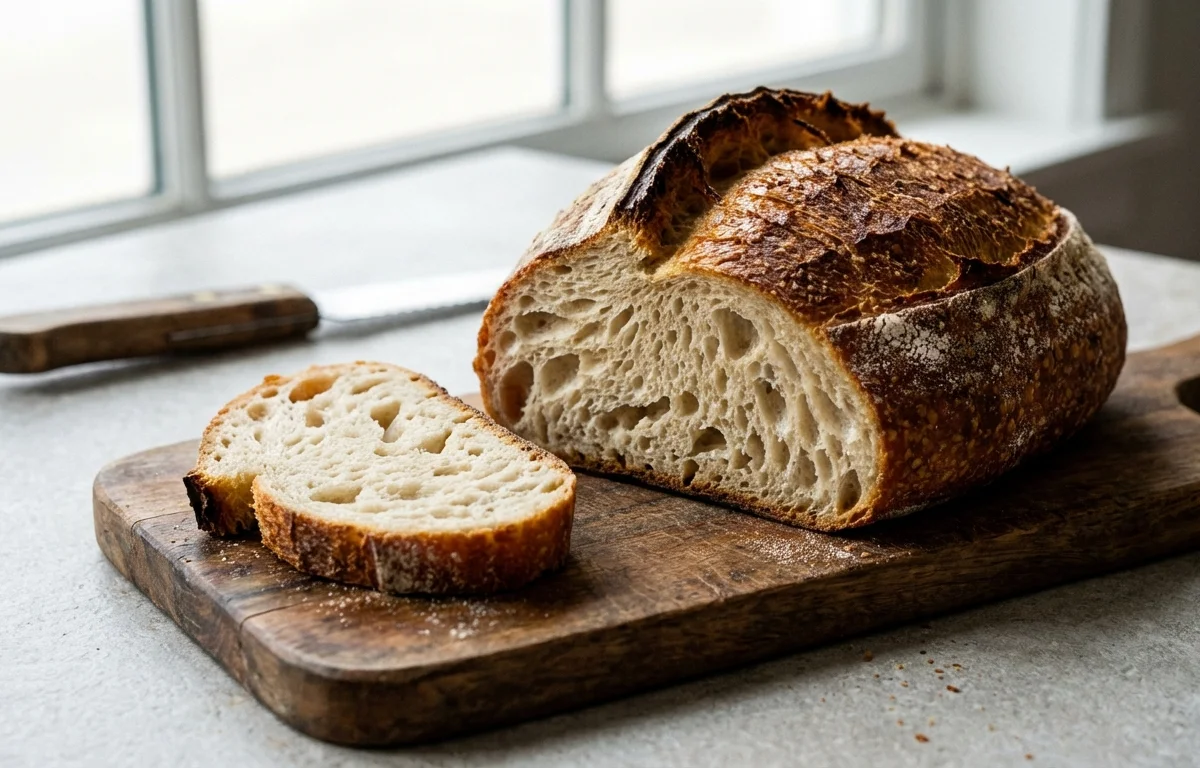
- 4Don't be afraid to get a dark crust! A deeply caramelized crust provides the best flavor and texture.
- 5Rice flour is excellent for dusting the banneton because it doesn't absorb moisture like wheat flour, preventing the dough from sticking.
- 6To check for doneness, you can use an instant-read thermometer. The internal temperature should be between 205-210°F (96-99°C).
Adapt it for your goals.
Whole Wheat Sourdough
Replace 100-150g of the bread flour with whole wheat flour for a nuttier flavor and denser crumb. You may need to add an extra 10-15g of water as whole wheat flour is thirstier.
Seeded SourdoughSeeded Sourdough
During the last stretch and fold, laminate the dough with 100g of toasted seeds like pumpkin, sunflower, and sesame for added texture and flavor.
Herb and Cheese SourdoughHerb and Cheese Sourdough
Incorporate 100g of shredded sharp cheddar or Gruyère cheese and 2 tablespoons of chopped fresh rosemary or thyme during the lamination step before shaping.
Why this is on our healthy list.
Improved Digestibility
The long fermentation process uses wild yeasts and lactic acid bacteria to break down some of the gluten and starches in the flour, making the bread easier for many people to digest.
Enhanced Nutrient Absorption
Sourdough fermentation reduces the levels of phytic acid, an antinutrient that can bind to minerals. This reduction allows your body to more easily absorb minerals like potassium, magnesium, and zinc from the bread.
Better Blood Sugar Control
Sourdough bread typically has a lower glycemic index (GI) than other types of bread. This means it causes a slower, more gradual rise in blood sugar levels, which is beneficial for sustained energy and blood sugar management.
Frequently asked questions
A typical slice of homemade sourdough bread, based on this recipe (approximately 87g), contains around 220-240 calories, primarily from carbohydrates.