Pita Bread
Fluffy, soft homemade pita bread with a perfect pocket for stuffing. This simple yeast bread recipe bakes up in minutes and is far superior to store-bought versions. Ideal for serving with dips, making sandwiches, or wrapping gyros.
For 4 servings
7 steps.
- 1
Step 1
- a.Activate the Yeast (5-10 minutes)
- b.In the bowl of a stand mixer or a large mixing bowl, combine the warm water, sugar, and active dry yeast.
- c.Stir gently to dissolve and let the mixture sit for 5-10 minutes.
- d.It's ready when it becomes foamy and bubbly on the surface, which indicates the yeast is active.
- 2
Step 2
- a.Mix and Knead the Dough (8-10 minutes)
- b.Add the all-purpose flour, salt, and olive oil to the yeast mixture.
- c.Using a dough hook on a stand mixer, mix on low speed until a shaggy dough forms, then increase to medium speed and knead for 6-8 minutes.
- d.Alternatively, mix with a wooden spoon and then knead by hand on a lightly floured surface for 8-10 minutes.
- e.The final dough should be smooth, soft, and elastic. It should spring back slowly when poked.
- 3
Step 3
- a.First Rise (60-90 minutes)
- b.Form the dough into a ball and place it in a lightly oiled bowl, turning it once to coat the surface.
- c.Cover the bowl with plastic wrap or a damp kitchen towel.
- d.Let the dough rise in a warm, draft-free location for 60 to 90 minutes, or until it has doubled in size.
- 4
Step 4
- a.Shape the Pitas (15 minutes)
- b.Gently punch down the risen dough to release the air. Transfer it to a lightly floured surface.
- c.Divide the dough into 8 equal pieces and shape each piece into a smooth ball.
- d.Cover the dough balls with a towel and let them rest for 10 minutes. This relaxes the gluten, making them easier to roll.
- e.Using a rolling pin, roll each ball into a circle about 6 inches in diameter and 1/4-inch thick. Keep the rolled pitas covered as you work.
- 5
Step 5
- a.Preheat Oven and Baking Surface (30 minutes)
- b.Place a baking stone, pizza steel, or an inverted heavy-duty baking sheet on the lowest rack of your oven.
- c.Preheat the oven to 475°F (245°C). Allow the baking surface to preheat for at least 30 minutes. This intense heat is crucial for the pita to puff.
- 6
Step 6
- a.Bake the Pitas (2-4 minutes per batch)
- b.Carefully open the oven and place 2-3 pitas directly onto the hot baking surface, ensuring they don't overlap.
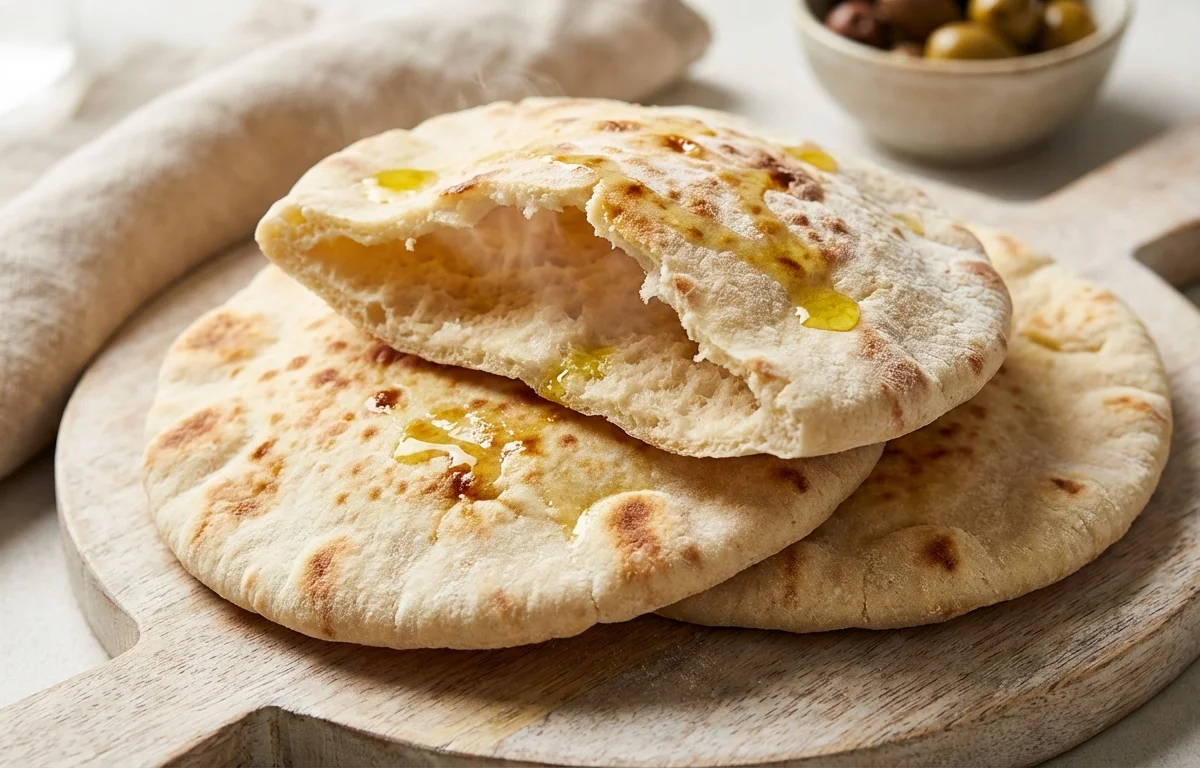
- c.Bake for 2 minutes. The pitas should puff up dramatically like a balloon.
- d.Using tongs, carefully flip the pitas and bake for another 1-2 minutes until lightly golden in spots but still soft.
- e.Repeat with the remaining dough.
- 7
Step 7
- a.Cool and Store
- b.Immediately after removing the pitas from the oven, wrap them in a clean kitchen towel.
- c.This traps the steam and keeps them soft and pliable as they cool.
- d.Serve warm or let them cool completely before storing in an airtight bag.
What to keep in mind.
5 tips from the recipe — small details that make a real difference to the final dish.
- 1The oven and baking surface must be extremely hot. Do not skip the 30-minute preheating step, as this is the key to creating the steam that forms the pocket.
- 2Ensure you roll the dough to an even 1/4-inch thickness. If it's too thick, it won't puff; if it's too thin, it will become crispy like a cracker.
- 3Handle the rolled-out dough gently to avoid deflating it or creating thin spots before baking.
- 4Work in batches. Overcrowding the oven will lower the temperature and prevent the pitas from puffing properly.
- 5Wrapping the pitas in a towel immediately after baking is essential for a soft, pliable texture.
Adapt it for your goals.
Whole Wheat Pita
Replace up to half of the all-purpose flour with whole wheat flour for a nuttier flavor and more fiber. You may need to add a little extra water as whole wheat flour is more absorbent.
Herb and Garlic PitaHerb and Garlic Pita
Add 1 teaspoon of dried oregano, 1/2 teaspoon of garlic powder, and 1/4 teaspoon of black pepper to the dry ingredients for a savory, aromatic twist.
Stovetop PitaStovetop Pita
If you don't have an oven, you can cook the pitas in a hot, dry cast-iron skillet over medium-high heat. Cook for about 30 seconds until bubbles form, flip, and cook for 1-2 minutes until puffed. Flip again and cook for another 30 seconds.
Why this is on our healthy list.
Source of Energy
Pita bread is rich in carbohydrates, which are the body's primary source of fuel, providing sustained energy for daily activities.
No Preservatives
By making pita bread at home, you avoid the artificial preservatives, dough conditioners, and high levels of sodium often found in commercially produced bread.
Low in Fat
This recipe uses only a small amount of heart-healthy olive oil, making it naturally low in fat compared to many other types of bread and baked goods.
Versatile and Filling
The pocket in pita bread makes it perfect for stuffing with lean proteins and vegetables, creating a balanced and satisfying meal that can help with portion control.
Frequently asked questions
The most common reason is insufficient heat. Your oven and baking surface (stone or steel) must be preheated to 475°F (245°C) for at least 30 minutes. Other causes could be rolling the dough too thick or too thin, or using yeast that was not properly activated.