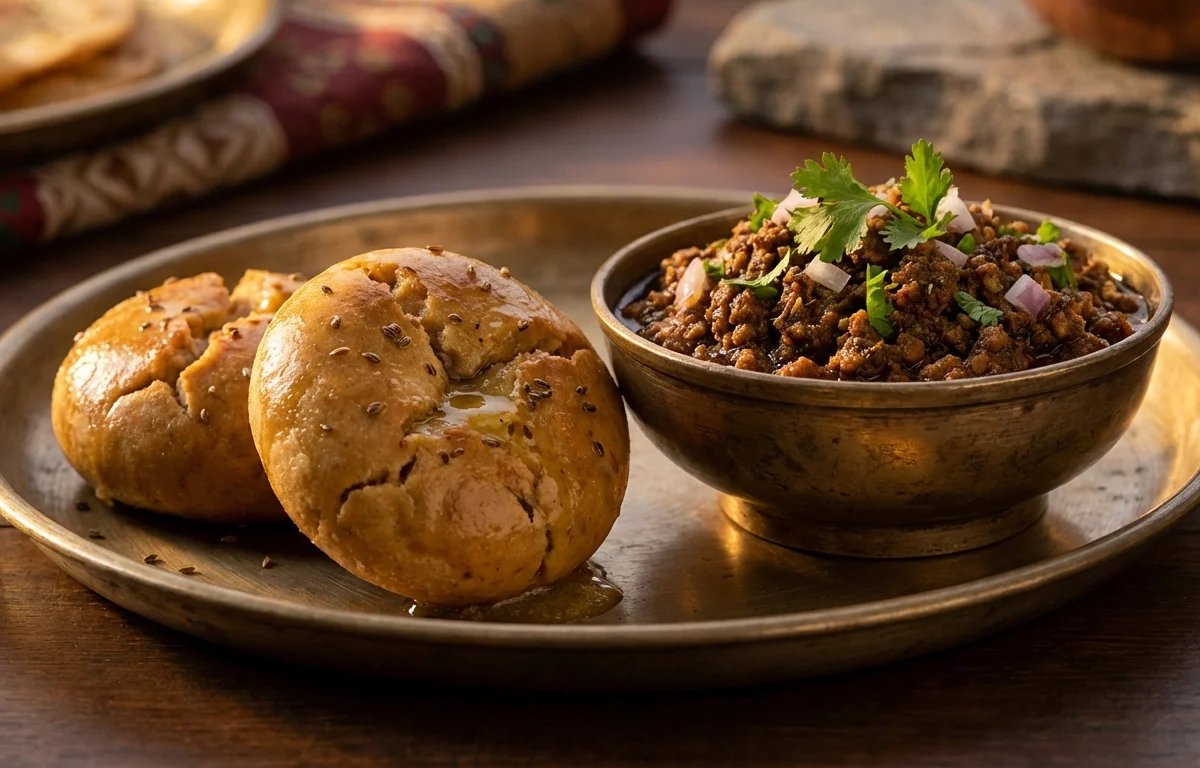
Keema Baati
A delicious Rajasthani twist on the classic baati! These crisp, golden orbs are stuffed with a spicy and savory minced mutton filling, then slow-fried in ghee to perfection. A hearty and indulgent meal, perfect for special occasions.
For 4 servings
5 steps. 35 minutes total.
- 1
Step 1
- a.Prepare the Keema Filling
- b.Heat 30g of ghee in a pan over medium heat. Add the cumin seeds and let them splutter.
- c.Add the finely chopped onion and sauté for 8-10 minutes until it turns soft and golden brown.
- d.Stir in the ginger-garlic paste and green chilies. Cook for 1 minute until the raw aroma disappears.
- e.Add the mutton keema. Increase the heat to high and cook for 5-7 minutes, breaking up lumps with a spatula, until the keema is browned.
- f.Reduce the heat to low. Add the turmeric powder, red chili powder, coriander powder, and 1 tsp of salt. Mix everything well.
- g.Cover the pan and let the keema cook on low heat for 15-20 minutes, stirring occasionally, until it is tender and the mixture is completely dry.
- h.Turn off the heat. Stir in the garam masala and chopped coriander leaves. Transfer the filling to a plate and let it cool down completely.
- 2
Step 2
- a.Make the Baati Dough
- b.In a large mixing bowl, combine the atta, rava, ajwain, baking soda, and the remaining 1 tsp of salt.
- c.Add 60g of ghee to the flour mixture. Rub it in with your fingertips until the mixture resembles coarse breadcrumbs. This 'moyan' is crucial for a crispy baati.
- d.Gradually add warm water, a little at a time, and knead to form a firm, stiff dough. It should be tighter than a regular chapati dough.
- e.Cover the dough with a damp cloth and let it rest for at least 30 minutes.
- 3
Step 3
- a.Stuff and Shape the Baatis
- b.After resting, knead the dough for another minute until smooth.
- c.Divide the dough into 8 equal-sized portions and roll them into smooth balls.
- d.Take one ball and flatten it with your palms into a 3-inch disc. Create a slight depression in the center to form a cup shape.
- e.Place about 1.5 to 2 tablespoons of the cooled keema filling in the center.
- f.Bring the edges of the dough together, pleating as you go, and pinch them firmly at the top to seal the filling inside.
- g.Gently roll the stuffed ball between your palms to form a smooth, crack-free sphere. Repeat with the remaining dough and filling.
- 4
Step 4
- a.Slow-Fry the Baatis
- b.Heat the ghee for deep-frying in a deep kadai or pot over a low to medium-low flame. The ghee should be hot but not smoking.
- c.To test the temperature, drop a tiny piece of dough into the ghee; it should sizzle and rise to the surface slowly.
- d.Carefully slide 3-4 baatis into the ghee, ensuring not to overcrowd the pan.
- e.Fry on a consistent low heat for 15-18 minutes, turning them occasionally for even cooking. Be patient, as this slow frying process is key to a crispy exterior and a perfectly cooked interior.
- f.Once the baatis are a deep golden brown and feel crisp, remove them with a slotted spoon and drain on a wire rack or paper towels.
- 5
Step 5
- a.Serve the Keema Baati
- b.While the baatis are still hot, use a cloth to hold one and gently press it with your thumb or the back of a spoon to create a slight crack on top.
- c.Generously pour the melted ghee over each baati, allowing it to seep inside the crack.
- d.Serve immediately with sliced onions, lemon wedges, and a side of green chutney.
What to keep in mind.
6 tips from the recipe — small details that make a real difference to the final dish.
- 1The baati dough must be stiff and firm. A soft dough will absorb excess ghee and result in soggy baatis.
- 2Ensure the keema filling is completely cool and dry before stuffing. Any moisture will make the baatis soggy from the inside and can cause them to break while frying.
- 3The secret to a perfect baati is slow frying on low heat. Frying on high heat will cook the outside too quickly, leaving the inside raw and doughy.
- 4Seal the baatis very carefully and ensure there are no cracks. This prevents the filling from leaking into the ghee during frying.
- 5For the most authentic experience, do not skimp on the ghee for serving. The ghee enhances the flavor and softens the baati's interior.
- 6You can prepare the keema filling a day in advance and refrigerate it to save time.
Adapt it for your goals.
Filling
For a lighter option, replace mutton keema with chicken keema. For a vegetarian version, use a filling of crumbled paneer, mashed potatoes, or soya granules.
Cooking MethodCooking Method
Instead of deep-frying, you can bake the baatis in a preheated oven at 180°C (350°F) for 25-30 minutes or until golden brown. You can also cook them in an air fryer at 180°C for 15-20 minutes.
Flavor AdditionsFlavor Additions
Add a handful of green peas (matar) to the keema filling for extra texture and sweetness. A pinch of kasuri methi (dried fenugreek leaves) can also be added for a more aromatic flavor.
Why this is on our healthy list.
Rich Protein Source
Mutton keema provides high-quality protein, which is essential for muscle repair, growth, and overall body function.
Provides Sustained Energy
The combination of complex carbohydrates from whole wheat flour and healthy fats from ghee offers a dense source of energy, keeping you full and satiated for longer.
Source of Iron
Mutton is a good source of heme iron, which is easily absorbed by the body and helps in preventing anemia and boosting energy levels.
Frequently asked questions
Keema Baati is an indulgent and calorie-dense dish due to the use of ghee and deep-frying. It's rich in protein and carbohydrates, making it a very filling meal. It's best enjoyed in moderation as part of a balanced diet, perhaps on special occasions.